
Ah! The Floyd Rose system, one of the most important and most complex inventions in the history of guitar playing. Some love it, some hate it. But at the end of the day, if you want it, you have to learn how to (restring &) tune it!
So, it’s time to restring your Floyd Rose guitar. start by putting it down on a soft surface so you make sure it doesn’t get scratched or damaged.
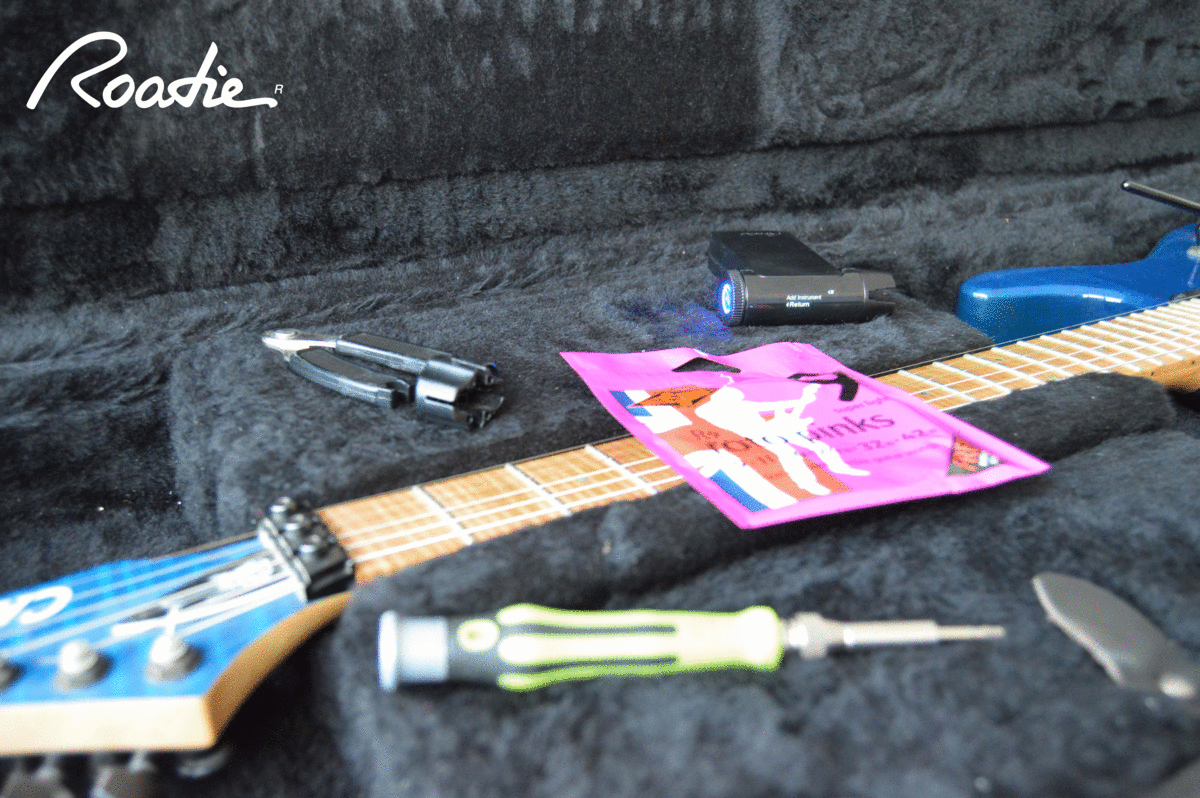
Next, have the following tools ready:
– Allen wrench
– New strings
– Wire cutter
– Roadie Tuner as a winder/unwinder & Tuner
Before you start, check the level of your bridge and make sure it’s straight. You have to be ready to tighten or loosen the springs on the backside of your guitar in case the bridge tension isn’t right. Now that you’ve checked your bridge level, you can start with changing the strings one at a time so that (again) you maintain the tension.
Here’s a step by step guide:
-
- Unlock the 1st locking nut bolt on the neck and clip off the low E string (using the wire cutter) right around the 12th fret. Your hand should be far from the fretboard so you don’t damage it.
- Loosen the nut on the bridge to get the string out. Be gentle with it until you get the needed tork which might take around 2 to 3 turns to be able to free the string.
- Remove the string and take out a new one. It will have a ball at the end of it. use the wire cutter to clip it off along with the winding part of the string.
- Feed the string inside the bridge, then detune the relative fine tuner so you can sharpen the new string when you stretch it out later on. Always check your bridge height, if it’s not straight then something’s not right.
- Tighten the nut using your allen wrench making sure it isn’t too tight.
- Pull the string along the fretboard through the locking nut, then through the post on the headstock.
- Wind the string using the wind/unwind feature on Roadie.
- Choose your tuning with Roadie (it can be drop tuning, open tuning, standard or other) to tune the low E string. Congrats! You’ve just finished re-stringing and tuning the low E string. The same process applies for the rest of the strings.
Create your own custom tuning:
Now that you have finished re-stringing and tuning all of the strings, it’s time to perfect the tuning process. To program your Roadie to automatically tune accurately to the cent, sharp or flat, check the tuning on the low ‘E’ again:
- If the low ‘E’ is now flat, you’ll have to program Roadie to tune the strings a little bit sharp.
- If the low ‘E’ is sharp, you’ll have to program Roadie to tune the strings a little flat.
Here’s an example of how to create your custom tuning using the Roadie app:
Go to “Tunings” / Select “Guitar” then 6 or 7 strings / Create new tuning.
In this example we’re going to tune all the string a bit flat (because usually when you tighten the locking nuts, the strings tend to go a bit sharp):
E2: – 1 cents
A2: – 2 cents
D3: – 1 cent
G3: – 2 cents
B3: – 3 cents
E4: – 3 cents

After you’re done creating your custom tuning, make sure you sync it with your Roadie 2 (this is only a one-time process).
Keep in mind: Every time you change the tension of one string, the other strings’ tuning changes as well. For that reason, you must keep re-tuning with Roadie until all the strings are at the desired tuning.
Finally, now that the strings are all changed and tuned, stretch them out a bit by pulling them up one by one gently. Lock the nut on the headstock and use the fine tuners to make the final tuning adjustments.
And Voilà!
Enjoy rocking your Floyd Rose!